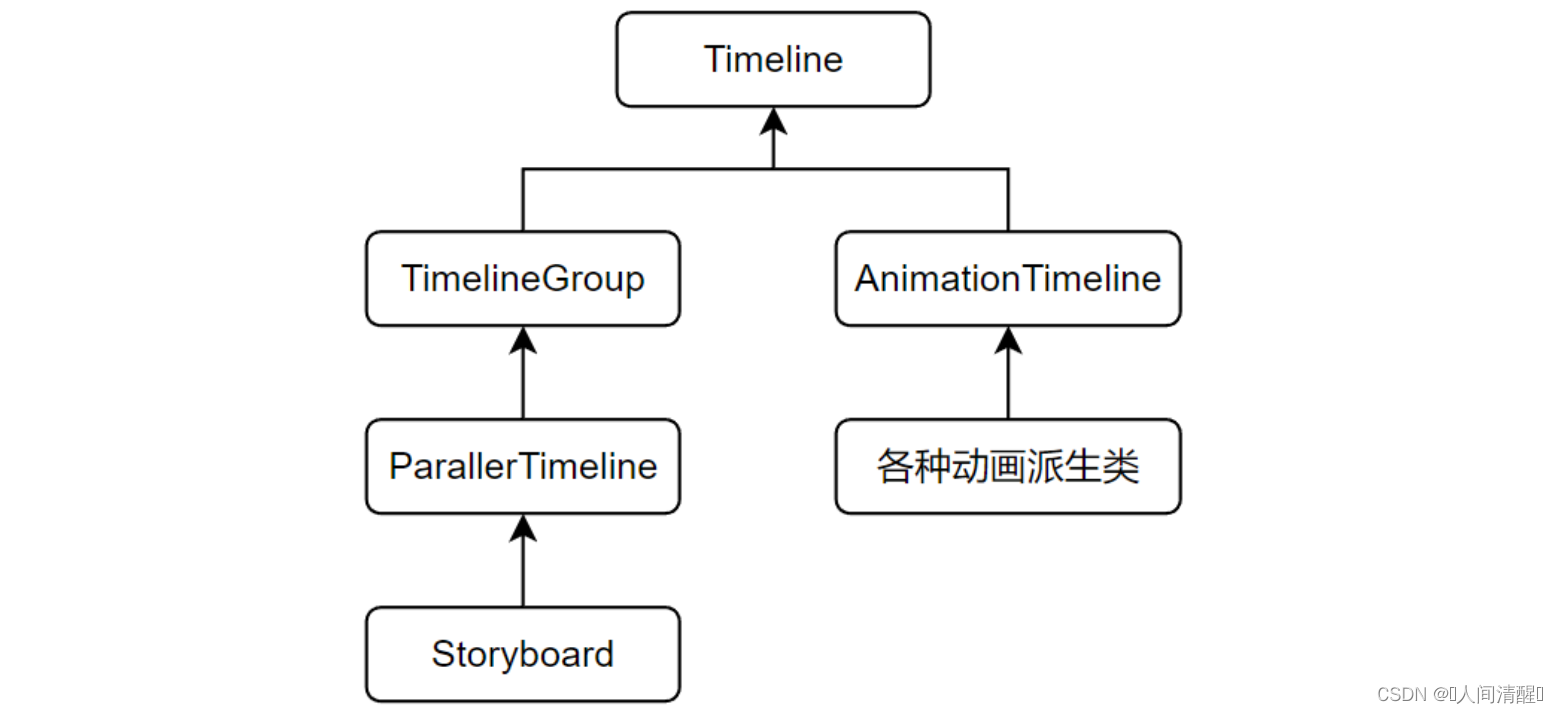
12.WPF动画 动画的就是在UI元素上施加一些Timeline实例。WPF把简单的动画称为AnimationTimeline,复杂的动画称为Storyboard。
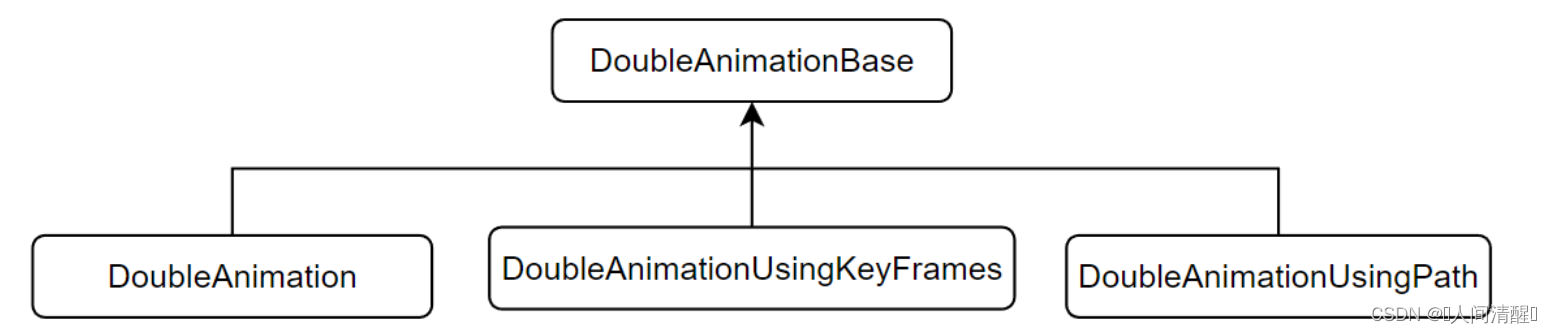
简单的独立动画 简单线性动画 WPF中动画系统中Dloble类型的属性用的最多,所以以DoubleAnimationBase为例
变化时间(Duration):必须制定,类型为Duration 变化终点(To):如果没有指定,采用上一次动画的终点或者默认值 变化幅度(By):如果指定了变化终点,变化幅度将被忽略 变化起点(From):如果没有指定变化起点,则以变化目标的属性当前值为起点 1 2 3 4 5 6 7 <Grid > <Button Width ="80" Height ="80" HorizontalAlignment ="Left" VerticalAlignment ="Top" Click ="Button_Click" > <Button.RenderTransform > <TranslateTransform X ="0" Y ="0" x:Name ="tt" > </TranslateTransform > </Button.RenderTransform > </Button > </Grid >
改变TranslateTransform对象X,Y的属性就会让Button的显示位置(非实际位置)改变
1 2 3 4 5 6 7 8 9 10 11 12 13 14 15 16 17 18 19 private void Button_Click (object sender, RoutedEventArgs e{ DoubleAnimation daX = new DoubleAnimation(); DoubleAnimation daY = new DoubleAnimation(); daX.From = 0 ; daY.From = 0 ; Random r = new Random(); daX.To = r.NextDouble() * 300 ; daY.To = r.NextDouble() * 300 ; Duration duration = new Duration(TimeSpan.FromMilliseconds(300 )); daX.Duration = duration; daY.Duration = duration; this .tt.BeginAnimation(TranslateTransform.XProperty, daX); this .tt.BeginAnimation(TranslateTransform.YProperty, daY); }
高级动画控制 除了From、To等属性还具有一下高级属性
属性 描述 AccelerationRatio 加速度,0-1且与DecelerationRatio和不大于1 DecelerationRatio 减速度,0-1且与DecelerationRatio和不大于1 SpeedRatio 快进和慢进 AutoReverse 倒放 RepeatBehavior 重复,0为不播放,n为播放n次。RepeatBehavior.Forever为循环 BeginTime 播放前等待时间 EasingFunction 缓冲式渐变
只需在上面的代码中加入
1 2 3 4 BounceEase be = new BounceEase(); be.Bounces = 3 ; be.Bounciness = 3 ; daY.EasingFunction = be;
关键帧 将上面案例的Button设置按照Z字型移动
1 2 3 4 5 6 7 8 9 10 11 12 13 14 15 16 17 18 19 20 21 22 23 24 25 26 27 28 29 30 31 32 33 34 35 36 37 38 39 40 private void Button_Click (object sender, RoutedEventArgs e{ DoubleAnimationUsingKeyFrames dakX = new DoubleAnimationUsingKeyFrames(); DoubleAnimationUsingKeyFrames dakY = new DoubleAnimationUsingKeyFrames(); dakX.Duration = new Duration(TimeSpan.FromMilliseconds(900 )); dakY.Duration = new Duration(TimeSpan.FromMilliseconds(900 )); LinearDoubleKeyFrame x_kf_1 = new LinearDoubleKeyFrame(); LinearDoubleKeyFrame x_kf_2 = new LinearDoubleKeyFrame(); LinearDoubleKeyFrame x_kf_3 = new LinearDoubleKeyFrame(); x_kf_1.KeyTime = KeyTime.FromPercent(0.33 ); x_kf_1.Value = 200 ; x_kf_2.KeyTime = KeyTime.FromPercent(0.66 ); x_kf_2.Value = 0 ; x_kf_3.KeyTime = KeyTime.FromPercent(1 ); x_kf_3.Value = 200 ; dakX.KeyFrames.Add(x_kf_1); dakX.KeyFrames.Add(x_kf_2); dakX.KeyFrames.Add(x_kf_3); LinearDoubleKeyFrame y_kf_1 = new LinearDoubleKeyFrame(); LinearDoubleKeyFrame y_kf_2 = new LinearDoubleKeyFrame(); LinearDoubleKeyFrame y_kf_3 = new LinearDoubleKeyFrame(); y_kf_1.KeyTime = KeyTime.FromTimeSpan(TimeSpan.FromMilliseconds(300 )); y_kf_1.Value = 0 ; y_kf_2.KeyTime = KeyTime.FromTimeSpan(TimeSpan.FromMilliseconds(600 )); y_kf_2.Value = 180 ; y_kf_3.KeyTime = KeyTime.FromTimeSpan(TimeSpan.FromMilliseconds(900 )); y_kf_3.Value = 180 ; dakY.KeyFrames.Add(y_kf_1); dakY.KeyFrames.Add(y_kf_2); dakY.KeyFrames.Add(y_kf_3); tt.BeginAnimation(TranslateTransform.XProperty, dakX); tt.BeginAnimation(TranslateTransform.YProperty, dakY); }
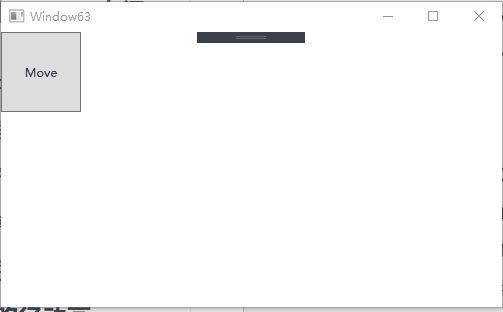
路径动画 让目标沿着给定的路径移动,使用DoubleAnimationUsingPath,需要一个PathGeometry来指定路径,PathGeometry的另一个重要属性是Source,枚举值为X\Y\Angle,例如Angle则表示关注曲线上每一点处切线方向的变化。
实例:让一个Button沿着路径移动
1 2 3 4 5 6 7 8 9 10 11 <Grid x:Name ="layoutRoot" > <Grid.Resources > <PathGeometry x:Key ="movePath" Figures ="M 0,50 C 300,-100 300,400 600,120" > </PathGeometry > </Grid.Resources > <Button Content ="Move" Width ="80" Height ="80" HorizontalAlignment ="Left" VerticalAlignment ="Top" Click ="Button_Click" > <Button.RenderTransform > <TranslateTransform X ="0" Y ="0" x:Name ="tt" > </TranslateTransform > </Button.RenderTransform > </Button > </Grid >
1 2 3 4 5 6 7 8 9 10 11 12 13 14 15 16 17 18 19 20 21 22 23 24 25 26 private void Button_Click (object sender, RoutedEventArgs e{ PathGeometry pg = this .layoutRoot.FindResource("movePath" ) as PathGeometry; Duration duration = new Duration(TimeSpan.FromMilliseconds(600 )); DoubleAnimationUsingPath dpX = new DoubleAnimationUsingPath(); dpX.Duration = duration; dpX.PathGeometry = pg; dpX.Source = PathAnimationSource.X; DoubleAnimationUsingPath dpY = new DoubleAnimationUsingPath(); dpY.Duration = duration; dpY.PathGeometry = pg; dpY.Source = PathAnimationSource.Y; dpX.AutoReverse = true ; dpX.RepeatBehavior = RepeatBehavior.Forever; dpY.AutoReverse = true ; dpY.RepeatBehavior = RepeatBehavior.Forever; this .tt.BeginAnimation(TranslateTransform.XProperty,dpX); this .tt.BeginAnimation(TranslateTransform.YProperty,dpY); }
场景 场景就是并行执行一组动画,WPF会把一组动画组织在Stroyboard中,安排好它们的协作关系。
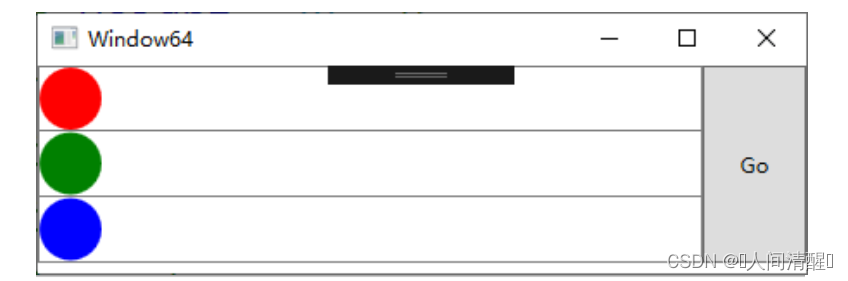
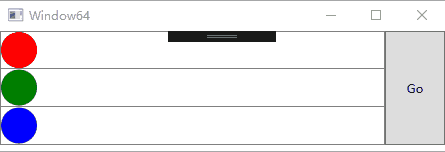
制作3个小球执行不同动画的场景
1 2 3 4 5 6 7 8 9 10 11 12 13 14 15 16 17 18 19 20 21 22 23 24 25 26 27 28 29 30 31 32 33 34 35 36 37 38 39 40 41 42 43 44 45 <Window x:Class ="WpfApplication1.Window64" xmlns ="http://schemas.microsoft.com/winfx/2006/xaml/presentation" xmlns:x ="http://schemas.microsoft.com/winfx/2006/xaml" Title ="Window64" Height ="159" Width ="461" > <Grid > <Grid.RowDefinitions > <RowDefinition Height ="38" /> <RowDefinition Height ="38" /> <RowDefinition Height ="38" /> </Grid.RowDefinitions > <Grid.ColumnDefinitions > <ColumnDefinition /> <ColumnDefinition Width ="60" /> </Grid.ColumnDefinitions > <Border Grid.Row ="0" BorderBrush ="Gray" BorderThickness ="1" > <Ellipse Width ="36" Height ="36" Fill ="Red" HorizontalAlignment ="Left" x:Name ="ballR" > <Ellipse.RenderTransform > <TranslateTransform X ="0" Y ="0" x:Name ="ttR" > </TranslateTransform > </Ellipse.RenderTransform > </Ellipse > </Border > <Border Grid.Row ="1" BorderBrush ="Gray" BorderThickness ="1,0,1,1" > <Ellipse Width ="36" Height ="36" Fill ="Green" HorizontalAlignment ="Left" x:Name ="ballG" > <Ellipse.RenderTransform > <TranslateTransform X ="0" Y ="0" x:Name ="ttG" > </TranslateTransform > </Ellipse.RenderTransform > </Ellipse > </Border > <Border Grid.Row ="2" BorderBrush ="Gray" BorderThickness ="1,0,1,1" > <Ellipse Width ="36" Height ="36" Fill ="Blue" HorizontalAlignment ="Left" x:Name ="ballB" > <Ellipse.RenderTransform > <TranslateTransform X ="0" Y ="0" x:Name ="ttB" > </TranslateTransform > </Ellipse.RenderTransform > </Ellipse > </Border > <Button Content ="Go" Grid.RowSpan ="3" Grid.Column ="1" Click ="Button_Click" /> </Grid > </Window >
1 2 3 4 5 6 7 8 9 10 11 12 13 14 15 16 17 18 19 20 21 22 23 24 25 26 27 28 29 30 31 32 33 34 35 36 37 38 39 40 41 42 private void Button_Click (object sender, RoutedEventArgs e{ Duration duration = new Duration(TimeSpan.FromMilliseconds(600 )); DoubleAnimation daRx = new DoubleAnimation(); daRx.Duration = duration; daRx.To = 400 ; DoubleAnimationUsingKeyFrames dakGx = new DoubleAnimationUsingKeyFrames(); dakGx.Duration = duration; SplineDoubleKeyFrame kfg = new SplineDoubleKeyFrame(400 ,KeyTime.FromPercent(1 )); kfg.KeySpline = new KeySpline(1 ,0 ,0 ,1 ); dakGx.KeyFrames.Add(kfg); DoubleAnimationUsingKeyFrames dakBx = new DoubleAnimationUsingKeyFrames(); dakBx.Duration = duration; SplineDoubleKeyFrame kfb = new SplineDoubleKeyFrame(400 ,KeyTime.FromPercent(1 )); kfb.KeySpline = new KeySpline(0 ,1 ,1 ,0 ); dakBx.KeyFrames.Add(kfb); Storyboard storyBoard = new Storyboard(); Storyboard.SetTargetName(daRx,"ttR" ); Storyboard.SetTargetProperty(daRx, new PropertyPath(TranslateTransform.XProperty)); Storyboard.SetTargetName(dakGx, "ttG" ); Storyboard.SetTargetProperty(dakGx, new PropertyPath(TranslateTransform.XProperty)); Storyboard.SetTargetName(dakBx, "ttB" ); Storyboard.SetTargetProperty(dakBx, new PropertyPath(TranslateTransform.XProperty)); storyBoard.Duration = duration; storyBoard.Children.Add(daRx); storyBoard.Children.Add(dakBx); storyBoard.Children.Add(dakGx); storyBoard.Begin(this ); storyBoard.Completed += (a, b) => { MessageBox.Show(ttR.X.ToString()); }; }
也可以直接使用XAML晚上上面的动画,Stroyboard一般都放在UI元素的Trigger中,Trigger在触发时会执行<BeginStoryboard>标签中的实例。
1 2 3 4 5 6 7 8 9 10 11 12 13 14 15 16 17 18 19 20 21 22 <Button Content ="Go" Grid.RowSpan ="3" Grid.Column ="1" Click ="Button_Click" > <Button.Triggers > <EventTrigger RoutedEvent ="Button.Click" > <BeginStoryboard > <Storyboard Duration ="0:0:0.6" > <DoubleAnimation Duration ="0:0:0.6" To ="400" Storyboard.TargetName ="ttR" Storyboard.TargetProperty ="X" > </DoubleAnimation > <DoubleAnimationUsingKeyFrames Duration ="0:0:0.6" Storyboard.TargetProperty ="X" Storyboard.TargetName ="ttG" > <SplineDoubleKeyFrame KeyTime ="0:0:0.6" Value ="400" KeySpline ="1,0,0,1" > </SplineDoubleKeyFrame > </DoubleAnimationUsingKeyFrames > <DoubleAnimationUsingKeyFrames Duration ="0:0:0.6" Storyboard.TargetName ="ttB" Storyboard.TargetProperty ="X" > <SplineDoubleKeyFrame KeyTime ="0:0:0.6" Value ="400" KeySpline ="0,1,1,0" > </SplineDoubleKeyFrame > </DoubleAnimationUsingKeyFrames > </Storyboard > </BeginStoryboard > </EventTrigger > </Button.Triggers > </Button >