7. WPF事件 路由事件 路由事件与直接事件(WinForm方式的事件)的区别在于:
直接事件激发时,发送者直接将消息通过事件订阅交给事件响应者,事件响应者通过处理方法做出响应。 路由事件的事件拥有者和响应者没有直接的订阅关系,事件拥有者只负责触发事件,事件的响应者则是安装事件监听器,针对某类事件进行侦听,当有此类事件传递到响应者就用事件处理方法来响应,并决定事件是否要继续向下传递。 WPF内置路由事件 案例:
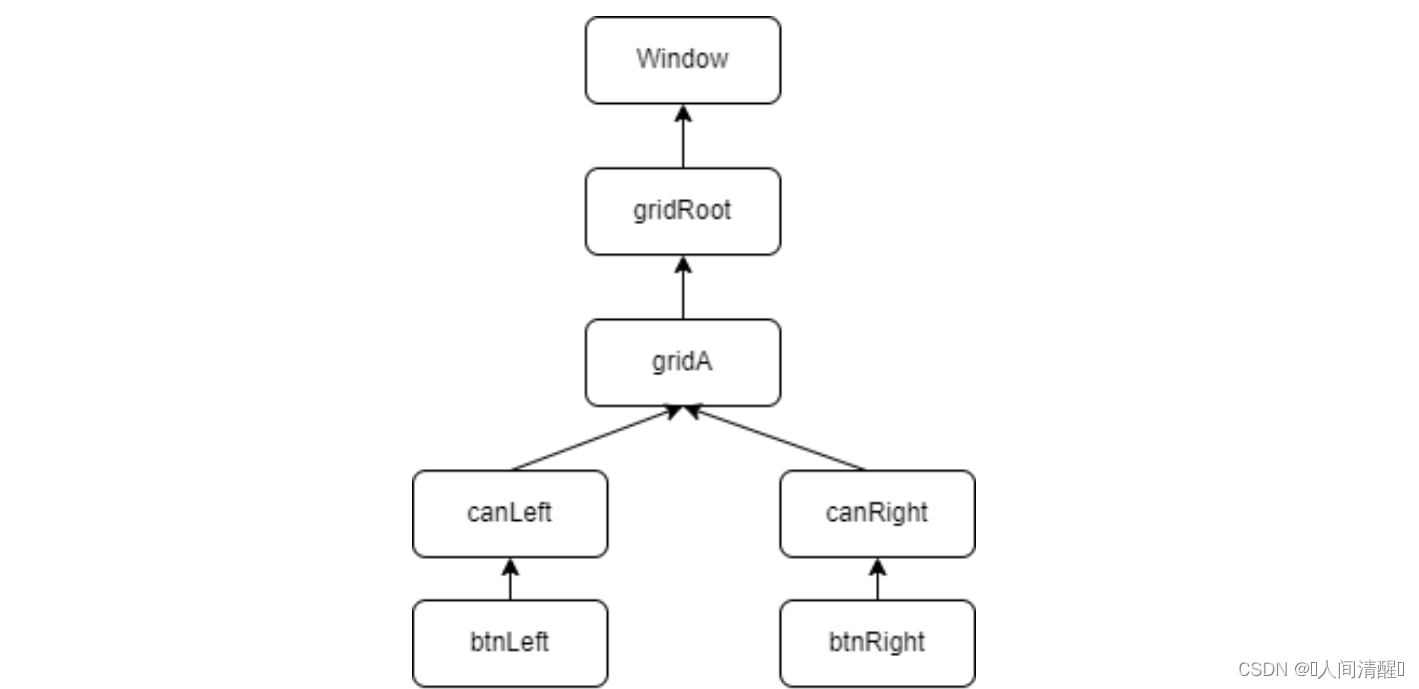
1 2 3 4 5 6 7 8 9 10 11 12 13 14 <Grid x:Name ="gridRoot" > <Grid x:Name ="gridA" > <Grid.ColumnDefinitions > <ColumnDefinition /> <ColumnDefinition /> </Grid.ColumnDefinitions > <Canvas x:Name ="canLeft" Grid.Column ="0" > <Button x:Name ="btnLeft" Content ="Left" /> </Canvas > <Canvas x:Name ="canRight" Grid.Column ="1" > <Button x:Name ="btnRight" Content ="Right" /> </Canvas > </Grid > </Grid >
逻辑树结构
当单击btnLeft时,Button.Click事件会沿着btnLeft-canLeft-gridA-gridRoot-Window路线传送,单击btnRight原理相同。
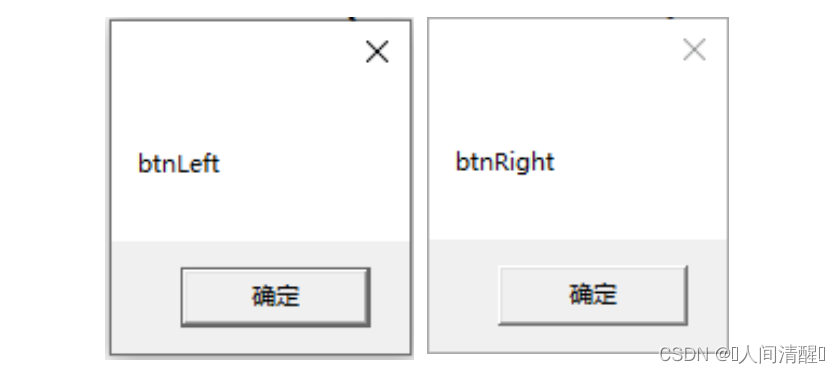
1
2
3
4
5
6
7
8
9
10
11
12
13
14
15
public MainWindow (){ InitializeComponent(); this .gridRoot.AddHandler(Button.ClickEvent, new RoutedEventHandler(this .ButtonClicked)); } private void ButtonClicked (object sender, RoutedEventArgs e{ MessageBox.Show((e.OriginalSource as FrameworkElement).Name); }
在XAML实现,<Grid x:Name="gridRoot" Button.Click="ButtonClicked">
自定义路由事件 自定义路由事件大致分为3个步骤:
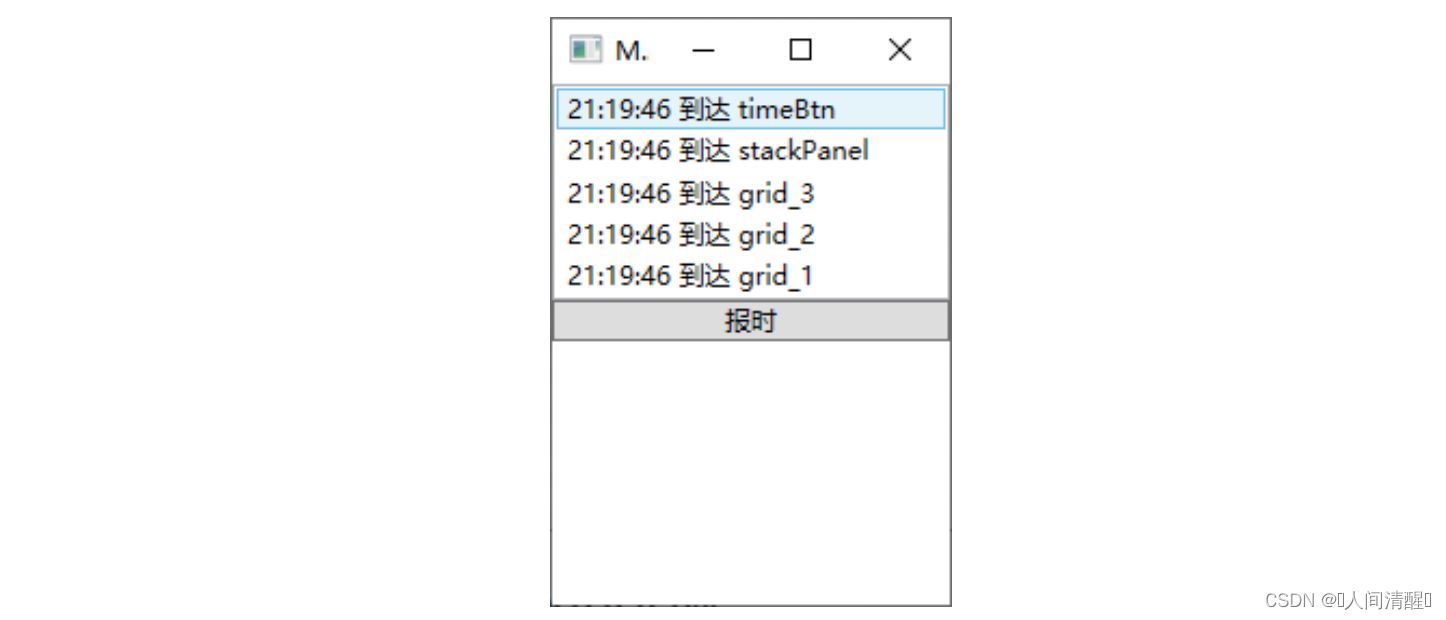
声明并注册路由事件,使用EventManager的RegisterRoutedEvent方法进行注册 为路由事件添加包装器,目的是把路由事件暴露的像一个传统直接事件,并仍然可以使用+=或者-=操作符。 创建可以激发事件的方法 案例:当点击按键时,报告事件发生的时间
1 2 3 4 5 6 7 8 9 10 11 12 13 14 15 16 17 18 19 20 21 22 23 24 25 26 27 28 29 30 31 32 33 34 35 36 37 38 39 40 41 42 43 44 class ReportTimeEventArgs : RoutedEventArgs { public ReportTimeEventArgs (RoutedEvent routedEvent, object source ) : base (routedEvent, source ) { } public DateTime ClickTime { set ; get ; } } class TimeButton :Button { public static readonly RoutedEvent ReportTimeEvent = EventManager.RegisterRoutedEvent("ReportTime" , RoutingStrategy.Bubble, typeof (EventHandler<ReportTimeEventArgs>), typeof (TimeButton)); public event RoutedEventHandler ReportTime { add { this .AddHandler(ReportTimeEvent, value ); } remove { this .RemoveHandler(ReportTimeEvent, value ); } } protected override void OnClick () { base .OnClick(); ReportTimeEventArgs args = new ReportTimeEventArgs(ReportTimeEvent, this ); args.ClickTime = DateTime.Now; this .RaiseEvent(args); } } private void ReportTimeHandle (object sender, ReportTimeEventArgs e{ FrameworkElement element = sender as FrameworkElement; string timeStr = e.ClickTime.ToLongTimeString(); this .listBox.Items.Add($"{timeStr} 到达 {element.Name} " ); }
1 2 3 4 5 6 7 8 9 10 <Grid x:Name ="grid_1" local:TimeButton.ReportTime ="ReportTimeHandle" > <Grid x:Name ="grid_2" local:TimeButton.ReportTime ="ReportTimeHandle" > <Grid x:Name ="grid_3" local:TimeButton.ReportTime ="ReportTimeHandle" > <StackPanel x:Name ="stackPanel" local:TimeButton.ReportTime ="ReportTimeHandle" > <ListBox x:Name ="listBox" /> <local:TimeButton x:Name ="timeBtn" Content ="报时" local:TimeButton.ReportTime ="ReportTimeHandle" /> </StackPanel > </Grid > </Grid > </Grid >
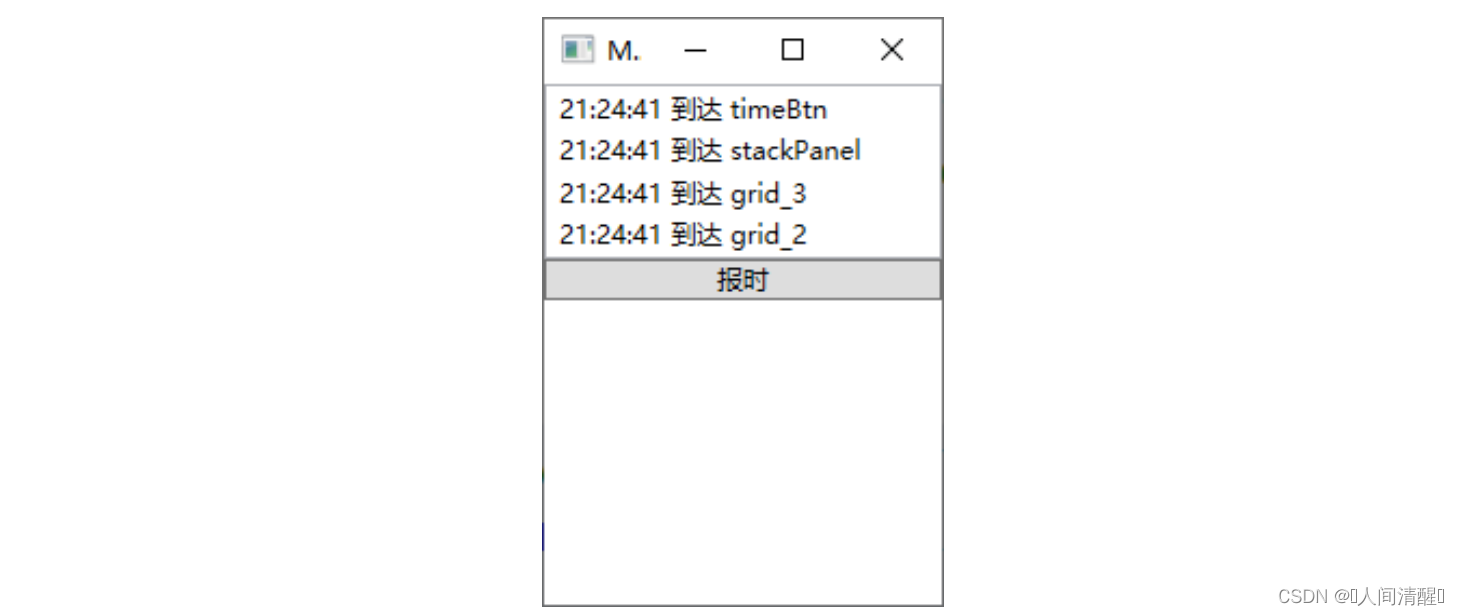
如果传递到某个节点不再继续向下传递事件可以将RoutedEventArgs中的Handled属性设置为true,意思为“已经处理完成”。
1 2 3 4 5 6 7 8 9 10 11 12 private void ReportTimeHandle (object sender, ReportTimeEventArgs e{ FrameworkElement element = sender as FrameworkElement; string timeStr = e.ClickTime.ToLongTimeString(); this .listBox.Items.Add($"{timeStr} 到达 {element.Name} " ); if (element == this .grid_2) { e.Handled = true ; } }
Source和OriginalSource 我们常说的WPF树形结构通常指的是LogicalTree,而事件则是沿着VisualTree传递的,他俩的区别在于:LogicalTree的叶子结点构成了用户界面,而VisualTree要连控件中的细微结构也算上。如一个ListBox控件的细微结构由Border、ScrollViewer、Grid等等组成。
Source代表着LogicalTree的事件起点 OriginalSource代表着VisualTree上的事件起点 附加事件 常见的附加事件
Binding类:SourceUpdated事件,TargetUpdated事件 Mouse类:MouseEnter事件、MouseLeave事件等 Keyboard类:KeyDown事件、KeyUp事件等 可以看出,路由事件的宿主都是拥有可视化实体的界面元素,而附加事件不具备显示在用户界面上的能力。
案例:设计一个Student类,如果其中的Name属性发生变化则激发一个路由事件,并用界面元素来捕捉。
1 2 3 <Grid x:Name ="gird" > <Button x:Name ="btn1" Content ="OK" Click ="Btn1_Click" /> </Grid >
1
2
3
4
5
6
7
8
class Student { public static readonly RoutedEvent NameChangedEvent = EventManager.RegisterRoutedEvent("NamgeChanged" , RoutingStrategy.Bubble, typeof (RoutedEventHandler), typeof (Student)); public int Id { set ; get ; } public string Name { set ; get ; } }
1
2
3
4
5
6
7
8
9
10
11
12
13
14
15
16
17
18
19
20
21
22
23
public MainWindow (){ InitializeComponent(); this .gird.AddHandler(Student.NameChangedEvent, new RoutedEventHandler(this .StudentNameChangedHandler)); } private void StudentNameChangedHandler (object sender, RoutedEventArgs e{ MessageBox.Show((e.OriginalSource as Student).Id.ToString()); } private void Btn1_Click (object sender, RoutedEventArgs e{ Student student = new Student() { Id = 100 , Name = "Tim" }; student.Name = "Tom" ; RoutedEventArgs arg = new RoutedEventArgs(Student.NameChangedEvent, student); this .btn1.RaiseEvent(arg); }
为附加事件增加包装器
1 2 3 4 5 6 7 8 9 10 11 12 13 14 15 16 17 18 19 20 21 public static void AddNameChangedHandler (DependencyObject d, RoutedEventHandler h ){ UIElement e = d as UIElement; if (e != null ) { e.AddHandler(Student.NameChangedEvent, h); } } public static void RemoveNameChangedHandler (DependencyObject d, RoutedEventHandler h ){ UIElement e = d as UIElement; if (e != null ) { e.RemoveHandler(Student.NameChangedEvent, h); } }
这样可以将上面this.gird.AddHandler(Student.NameChangedEvent, new RoutedEventHandler(this.StudentNameChangedHandler));Student.AddNameChangedHandler(this.gird, new RoutedEventHandler(this.StudentNameChangedHandler));,<Grid x:Name="gird" local:Student.NameChanged="StudentNameChangedHandler">